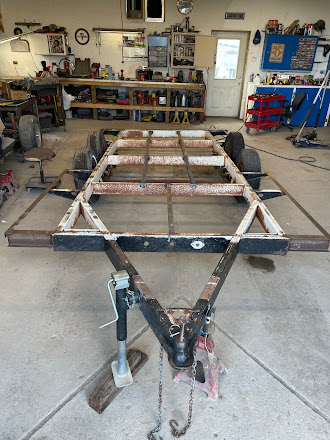
It all started January of 2021 with an 8' x 14' old camper trailer I bought from a friend for $75. I needed and office/craft space/peaceful getaway, and an idea was hatched. With the help of my husband and our 3 boys we cut off the bent pieces of the trailer and welded on straight pieces. We strengthened it up with angle iron too. This trailer is taking a while to build but I can only do it with spare time and that is hard to come by these days. 😒
Now, be kind, this was our first attempt at building a tiny house/office. I was trying to keep in mind the weight for traveling but to be honest I wanted a solid building that was comfy and warm. It's mainly going to sit in its spot but being on a trailer we can move it around when needed. I even drove it to my friends house 15 miles down the highway (road test) and it did fine.
Update: Just to let you know, I have decided to sell this tiny house/office. If you are interested please email me at: lavyndrfaire@gmail.com and make me an offer. It can be bought right now and you can finish it with your own creativity. I will of course keep working on it while it is here, but the more I do to it, the more the price goes up. I really love it but I recently purchases an 8' x 17' trailer and the extra room would be handy for my projects. I won't start the new trailer project til this one is gone though.

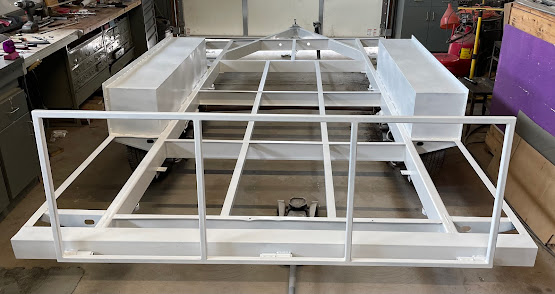
We did weld on some fenders. I chose square because it will be easier to build with on the inside. Yes I know I need new tires. 👍 We cleaned up and painted under there too.
During the welding process we also ground off all the rough bits and sanded it. I used a rust cleaner to try and get as much off as possible. We then primed and painted it. I chose white because I wanted to be able to see any problem areas that may pop up later. I would have loved to powder coat it but we don't have an oven that big!!! 😂
I wanted a floor that would keep insects and rodents out! So I added sheet metal under the floor. The foam (Sill Seal) under the boards is to keep the wood from touching the metal. When warm wood touches cold metal you can get condensation and that's where mold problems start.
We dry fit the plywood floor and I decided to try something new. I burnt it with a torch and just love how it turned out💜 Note to self: next time I do this flooring, SEAL IT right away or COVER with construction paper stuff so all the traffic of building does not wear away the burn part. UGH! Yes I learned the hard way. BUT on the positive side, I can re-burn it and seal it right away this time!
After dry fit and burning the floor, I picked it up and insulated the floor joists with Rockwool. I personally do not like fiberglass. This stone wool is amazing to work with and I love it!
Time to get some walls up!
We had to pull it out from under the roof to build its own roof. This of course meant I had to keep a tarp on it while working on it. This is not easy in SD wind. LOL!

We cut rafters out of plywood that we glued and screwed together to make them thicker.
I wanted to have that "wood slat" type ceiling. After checking on prices and trying to figure how much labor it was going to be to sand and stain all those boards, my husband came up with the idea of using paneling. I was not keen on it at first but when we went and looked at it we found this pretty one and it looks great. Just laid it over the rafters and screwed it on.
A layer of self adhesive leak barrier is stuck on the top of the paneling. Then two layers of 1 1/2 inch thick rigid foam is held in place with 1/2 inch wood slats for air gaps.
Then I added 1/4 in plywood on top (maybe should have put 2 layers) but it is what it is. On this I rolled out self adhesive reflective roofing (made for flat roofs mostly). It is supposed to reflect heat and such. I also kind of like how it almost looks like canvas with the wrinkles. It works great!

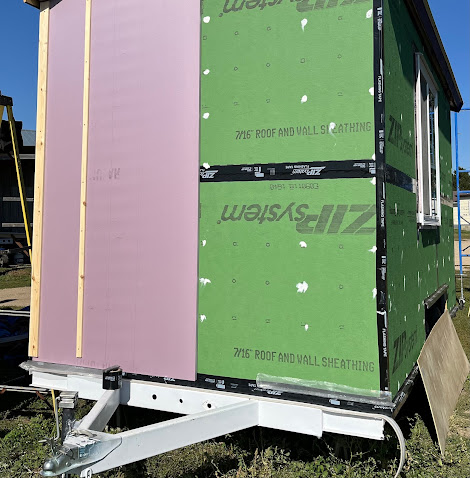
On the sides I used 1/2 in Zip sheathing, taping the seams. One inch thick rigid foam on these with 1/2 in wood slats for air gap. Bug screen on top and bottom of walls. This way if leaks happen in the roof or siding, water should run down the air gaps and out of the bug screen and not hurt your walls or ceiling at all. The external insulation is a GREAT thermal break too!
My son asked why I put the foam on and we did an experiment to show him. This was a very hot SD summer day when we put this foam on the wall. I had him go get the thermometer and we went inside and aimed it at the side with no insulation outside, it was 123 degrees on that wall!
Aimed it at the side we put insulation on just minuets before and it was 108 degrees. 15 Degree difference in just minuets! Wait a bit longer and that wall cools even more. So yeah, it's worth it! Next time I may just skip the 1/2 in sheathing and just foam the wall. Less weight and I'm not worried about stability cuz I can use the metal strips and the inside wall will be wood.
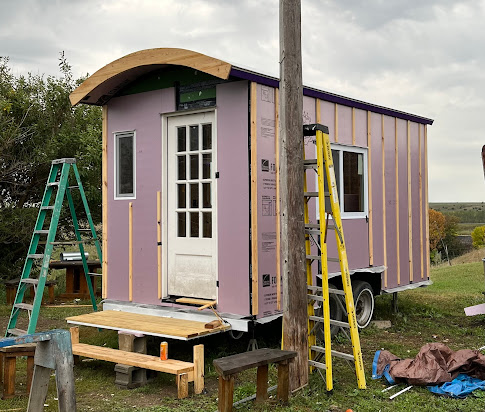
Added siding, then paint. I did paint all the battons dark purple but I think it makes it too "busy". I may paint it again and only go dark on the corners and trim. The rest can be the lilac color of the siding to blend in more. It is still a work on progress but my nephew likes to stay in it when he comes to visit. Also my husband has moved his TV, Xbox and a cot out there for a "man cave". I will add more when I can get back to working on it.
Finally got to work on the tiny again. Putting up more insulation.
Now for some interior walls. I'm using 1/4" panels. I have the 1/2" sheathing on the outside so I'm not worried about strength. These panels are more lightweight. If I did not have sheathing on the outside (i.e. foam, house wrap, air gap, siding), I would use tongue & groove car siding on the inside. Personal preference.
It's looking great so far!


No comments:
Post a Comment